Make Wedding Invitation Labels from your Spreadsheet
Step 1: Prepare Your Data in Excel
Download our wedding planning spreadsheet for Excel and type all your guests’ contact information into the “Guests” tab. Make sure each guest has complete address data:
- Their street address, city, state, and zip code.
- A value in the “Country” field if their invitation will be mailed internationally.
- Their full name(s) in the “Addressee” field.
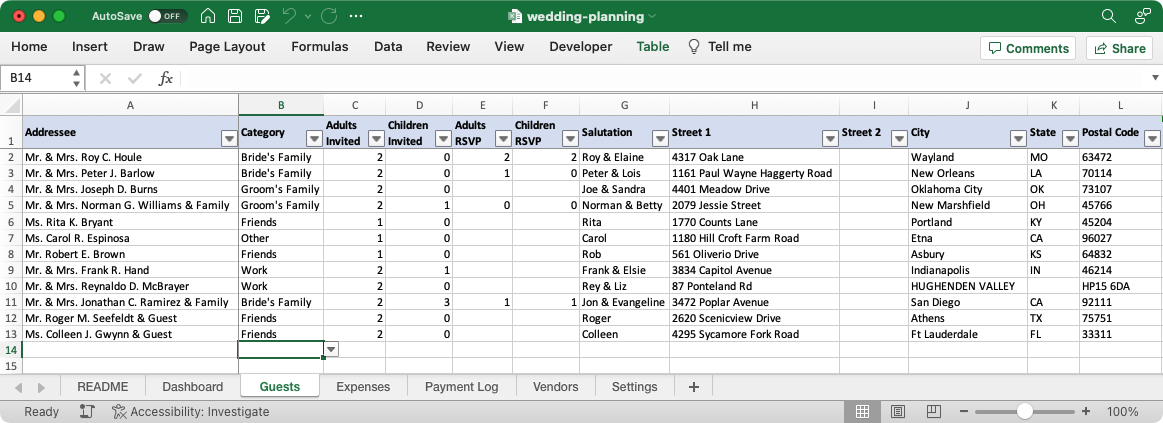
After you’ve entered all your data into the Excel spreadsheet, save the file.
Step 2: Create a new mailing in Microsoft Word
- Open Microsoft Word and create a new document.
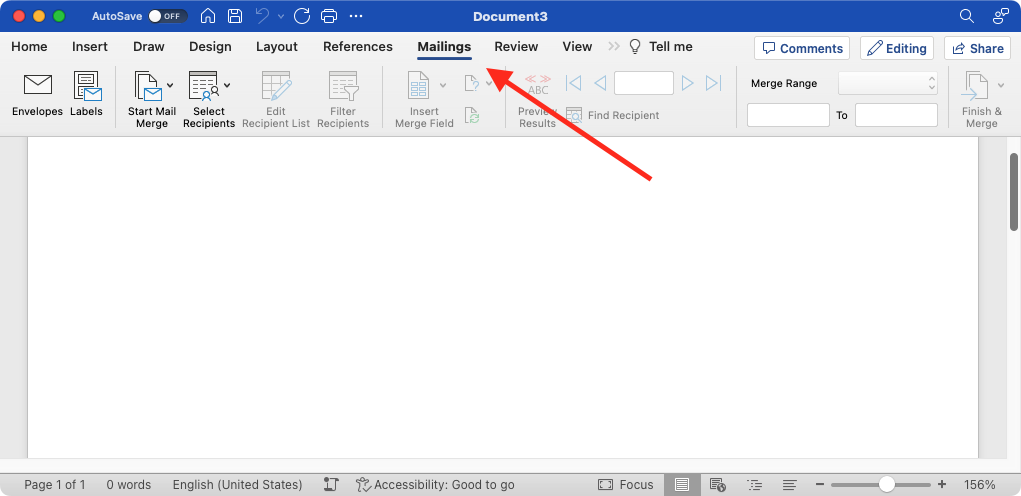
- Click the “Mailings” tab above the ribbon at the top of the window.
Step 3: Start the Mail Merge Process
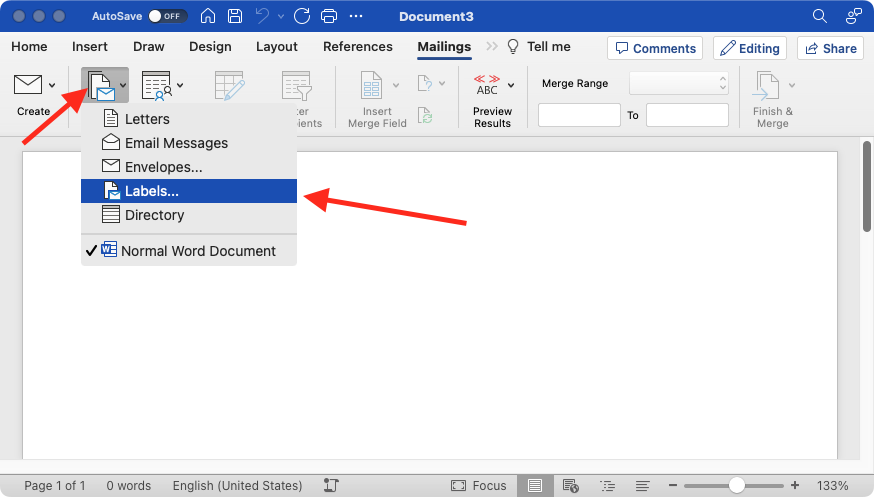
Click on the “Start Mail Merge” button and select “Labels” from the dropdown menu.
Step 4: Select Your Label Type
In the “Label Options” dialog, choose the kind of label you want to use. You can choose from a wide variety of label types, such as Avery 5160, 8160, 5163, and more.
Choosing the correct label size is crucial when doing a mail merge as it ensures that the text fits properly on the label paper and that the information is aligned correctly. Using the wrong label size can result in wasted ink, label paper, and a lot of frustration as the labels may not print correctly or may be difficult to read.
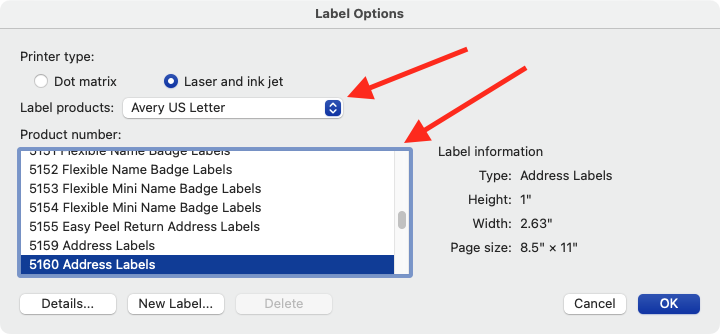
Word needs to know the “make and model” of your labels so it can format each page correctly. You have three choices to make in this window:
- Printer type
- This is "laser and ink jet" for most people.
- Label products
- Pick the name of the company who made your labels.
- Product number
- Pick the exact ID number and name of your label.
Each time you change the “Label products” drop down, Word will repopulate the “Product number” box with the various label types made by that company.
Check your labels’ packaging for which product number to choose. Most companies will print the exact id numbers somewhere on the box. Once you have selected the label type, click on “OK.” Don’t worry if you don’t see lines or borders appear on the document. Just leave the cursor where it is (at the beginning of the page). We’ll see a preview of the labels after a few more steps.
Step 5: Select Your Recipients
Click on the “Select Recipients” button and choose “Use Existing List.”
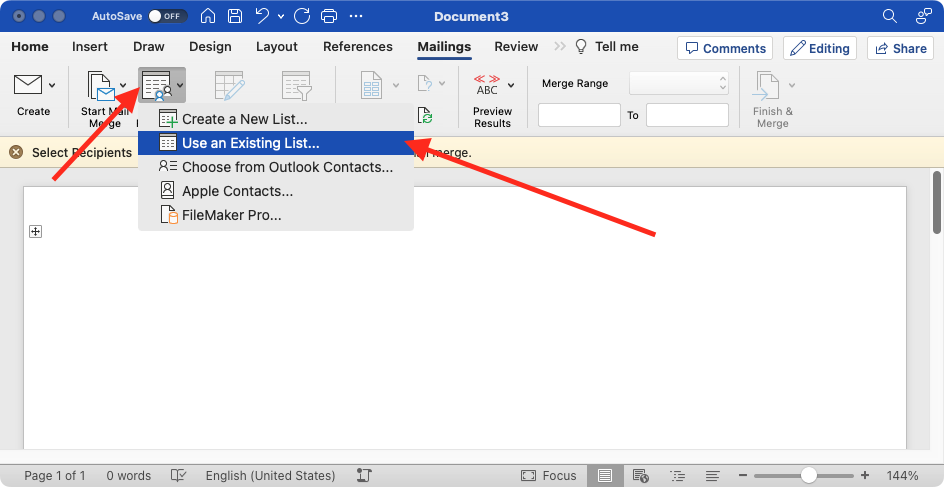
A file browser dialog window will appear. Browse to find and select the Excel spreadsheet you saved earlier.

You’ll be asked to choose which part of the spreadsheet contains the address data (since the spreadsheet has multiple tabs). Pick “Guests” from the “Open Workbook” drop down menu:
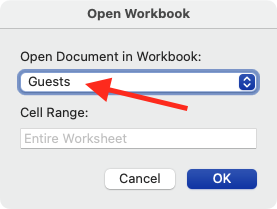
Skip the “Cell range” field. Leave it as “Entire Worksheet”.
Step 6: Insert Merge Fields
Click on the “Insert Merge Field” button and select the fields you want to include on your mailing label.
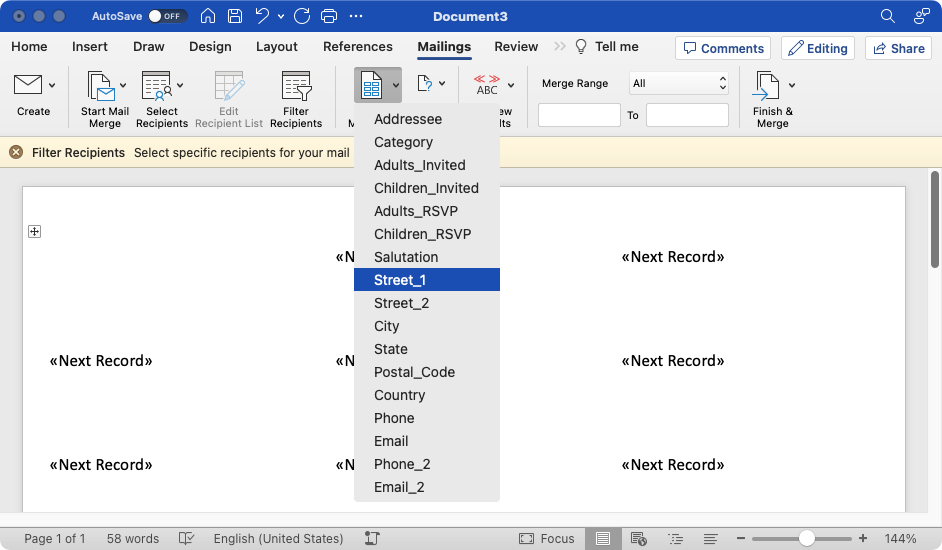
These fields will automatically populate with the column names from the spreadsheet’s “Guests” tab. Repeat clicking “Insert Merge Field” and picking each field you want to add. Fields will be inserted wherever the cursor is located.
At a minimum, you’ll need:
AddresseeStreet_1CityStatePostal_Code
If your guests have longer addresses or live in other countries, you may also need “Street_2” and “Country”.
Step 7: Copy Merge Fields to Every Label
Click “Update Labels” to copy the inserted merge fields to every label on the page. You should see the address template duplicated many times.
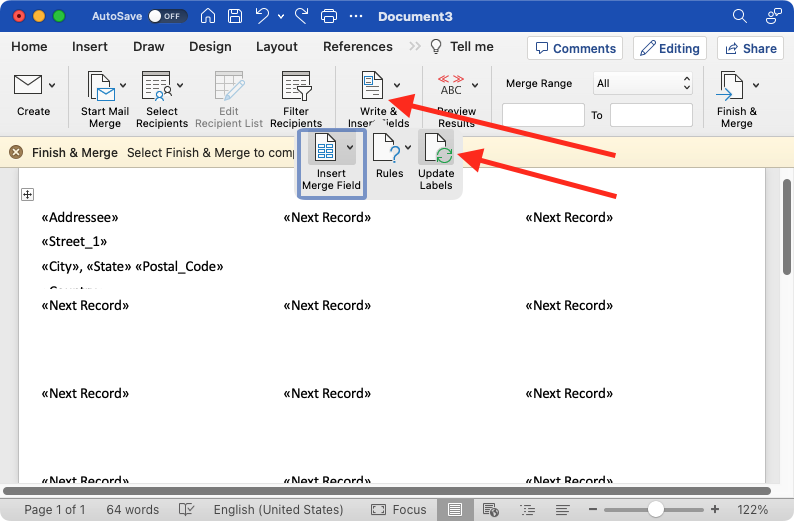
If you don’t see “Update Labels” in the mailing ribbon, it may be hidden under “Write & Insert Fields”.
Step 8: Preview Your Labels
Click on the “Preview Results” button to see how your labels will look. You can use the “Previous” and “Next” buttons to navigate through the different labels.
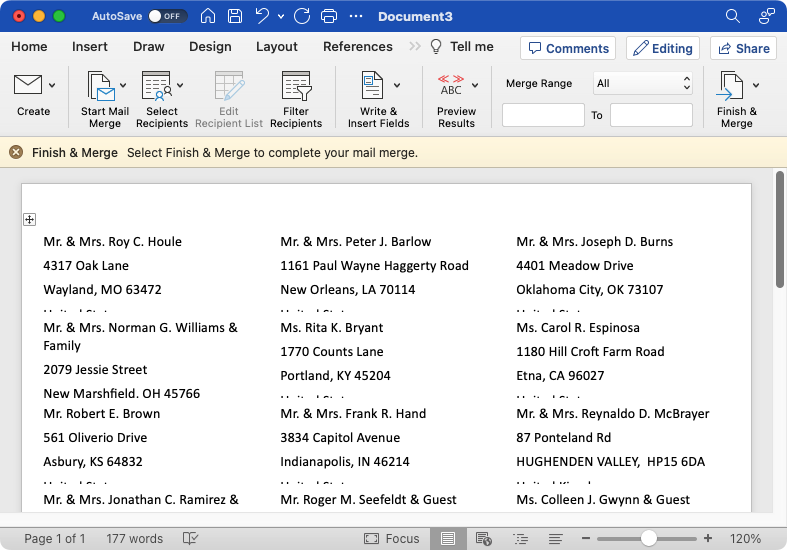
At this point you may notice problems with formatting. For example, notice that the country names in my screenshot are cut-off at the bottom of each label.
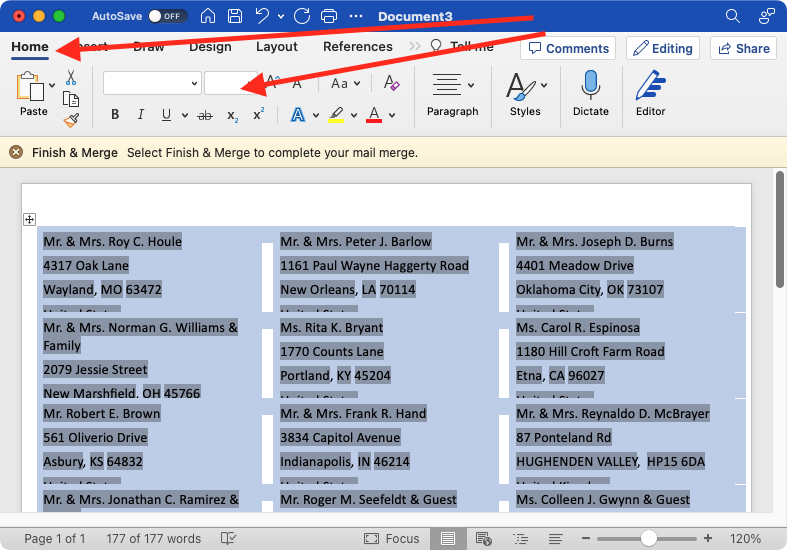
To fix this particular problem, I go to the “Home” tab, hit
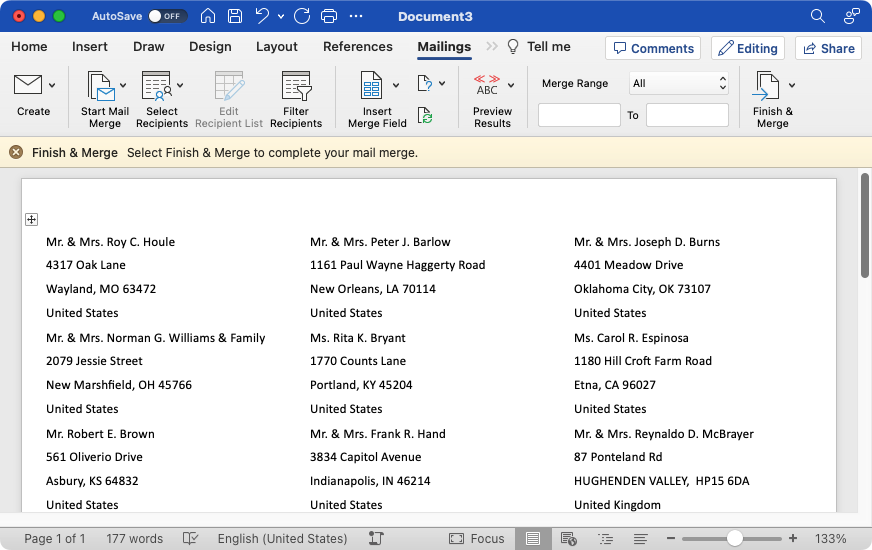
Back on the mailing ribbon, my labels are looking well-formatted now:
Reminder: if you add or remove any merge fields, hit the “Update Labels” button again (from step 7).
Step 8: Merge Your Labels
Once you’re happy with how the preview looks, click the “Finish & Merge” button, and select “Print Documents.” This will print out your mailing labels.
Congratulations, you’ve successfully created mailing labels in Microsoft Word by doing a mail merge from an Excel spreadsheet!